Years ago, Jesse Garant remembers meeting with early adopters of additive manufacturing who were unsure how to inspect the complex internal assemblies of their alloy printed parts. They had great solutions for the aerospace market, but under the word inspection, written on the white board, was a large question mark.
“This is when I really started to put the pieces together and said (feasible high-energy computed tomography) scanning is something that can be used in manufacturing moving forward,” he recalls.
Building on that insight, Garant’s new high-energy industrial CT scanner will be especially attractive to the growing world of additive manufacturing. His company spent three years and $4.5 million building the huge, one-of-a-kind scanner. It debuted this fall, scanning midsized parts in a 1.8 million pound reinforced concrete room at Jesse Garant Metrology Center. It joins eight smaller micro-focus CT scanners already owned by the business, allowing Garant to match the right tool for the job, depending on the density, material and size of the part to be inspected.
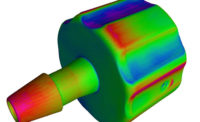
Industrial CT scanning uses high-powered x-rays to penetrate the internal geometries of an object, creating an ideal inspection tool for high-value parts where destructive testing is financially prohibitive. The ability to resolve internal dimensions without altering an object’s construction is also advantageous for inspecting 3D-printed parts with complex internal assemblies.
Garant says the high-powered scanner aims to fill the gap in current inspection technologies that limit the use of industrial CT technology due to part size and density. This will allow for internal inspection and dimensional validation of high-value parts that would otherwise go into production without proper inspection.
“It really kind of changes the game for plastics right now,” he says. “It’s not going to check every part. But when you look at the pre-production stage and how you validate some of these larger plastic parts, CT wasn’t really used because it wasn’t really a feasible technology. Now, we have something we can really sell to even the automotive community for plastics, for those larger parts and for the 3D internal inspection.”
In addition to plastic, the new system sees through about 12 inches of iron, 26 inches of titanium, and 36 inches of aluminum—ideal for inspecting medium-sized castings for aerospace.
The new system pairs a 3 MeV cone-beam x-ray source with a large-format 2k x 2k flat-panel digital detector. It’s able to accommodate rapid inspection of mid-size parts, up to 44.5 inches in diameter by 63 inches in height. This will be advantageous for internal inspection of engineered parts, composites, castings, and 3D printed alloy parts for a variety of industries, including aerospace, defense, automotive, and oil and gas.
The cone-beam technology paired with a large format detector allows the system to scan parts much more quickly and affordably, as compared to a Line Detector Array (LDA) system, which scans a single line as the part is rotated 360 degrees. “With LDA technology you’re taking a single slice approximately every 45 seconds,” Garant explains. “And if you’re taking 2,000 slices multiplied by 45 seconds, your time really adds up.”
A complete scan with an LDA system might take 4-16 hours. A complete scan with the new high-powered cone-beam source paired with a large format detector can be completed in less than one hour.
“It’s extremely beneficial from a time perspective,” Garant says. “A lot of our clients are looking for a feasible inspection that can be continuously used in industry, as opposed to something that is very costly which prohibits the amount of use of that system.”
When time is money, the cost to inspect a part line-by-line (or slice-by-slice) would reach upwards of $10,000, he said, which means a part would have needed to be worth at least $100,000 to make CT scanning worthwhile.
“The new price point for the system is considerably lower than our old one, just due to the amount of throughput that we can put through the system,” he says. “By dropping that price point we can now start to see a lot more volume in the pre-production side, where manufacturers can spend more time testing multiple iterations of that part before production begins. That’s in addition to the production side, where we can now start to check every part for key components, and especially moving into the additive industry, where a lot of these parts, especially for light-weighting technologies in aerospace where parts are manufactured out of aluminum and titanium.”
Garant has been a vocal advocate for CT scanning since launching his company in 2009, but the educational phase of the technology is still a work in progress.
“Right now, I see a lot of people are using it from a failure investigation standpoint,” he says. “That’s probably the most common user entry point into the market. To maximize the use of the technology, failure investigation should probably be about a 5% use of the market. Where the technology is really going to start to explode is in the pre-production side for product validation, and production part validation for those high-value parts.
“From there, manufacturers will start to acquire systems or use service labs more regularly, just due to the benefit of manufacturing a superior part and keeping those quality control requirements in place.”
Visit the Jesse Garant Metrology booth at the Quality Show, Oct. 24-26 at the Donald E. Stephens Convention Center in Rosemont, IL.


